Purpose
The UO Spaces Database is a web-based application that provides university administration and other designated staff with more current information; it also may be used by units to maintain allocation and utilization data on their own spaces for the purpose of internal decision making.
Designed as an addendum to the documentation available on the Space Utilization and Classification Manual (the "Space Manual"), this guide provides step-by-step instructions for the UO Spaces website and for managing your unit's allocated physical spaces using the new web interface.
Getting Started
Go to UO Spaces Database website and sign in using your DuckID and password.
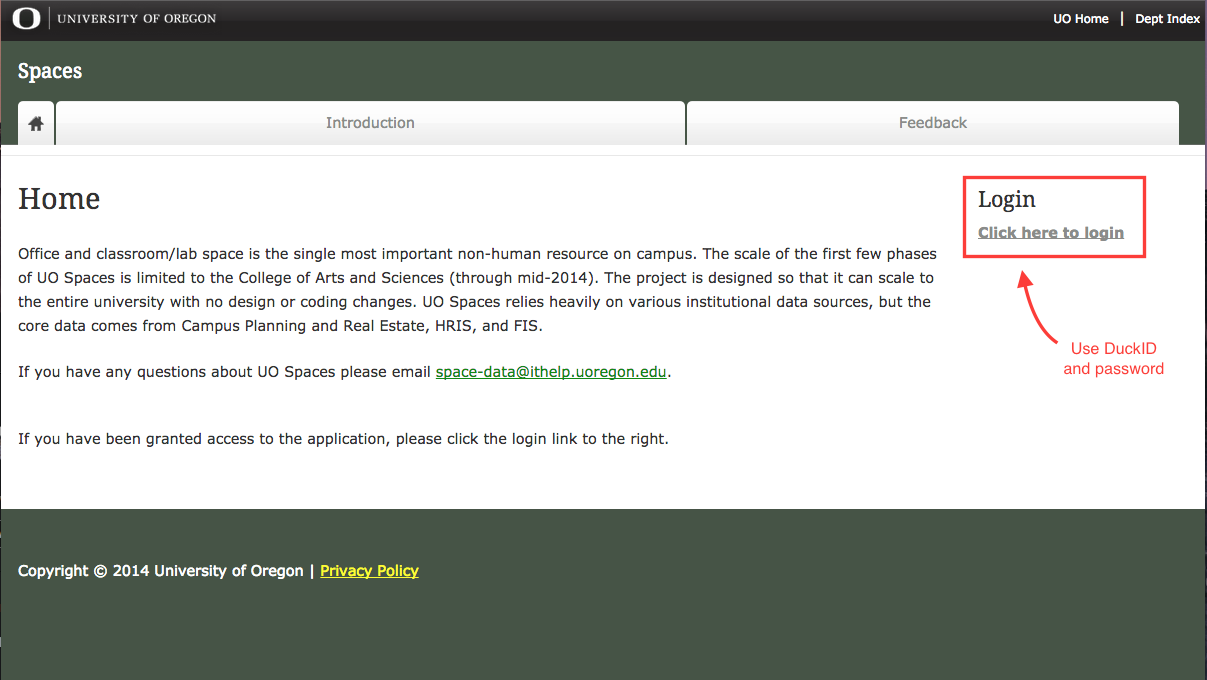
Upon signing-in, additional tabs become available based upon the user's clearance level. Level 5 access is shown below.
Note: If additional tabs do not appear upon login, you still may need to be granted access. Fill out this form and send by e-mail or Campus Mail to the site administrators (more information is on the form).
Note 2: If you have submitted an access form, please allow one to two business days for processing. You will receive e-mail confirmation upon being granted access.
Introductory Documentation, Glossary of Terms, and Update News
UO Spaces offers information regarding Space Utilization and Classification with a table of contents that link to additional content pertaining to the definition of common terminology used for this project. Links to this information will also be scattered throughout the various sections where appropriate for clarification purposes.
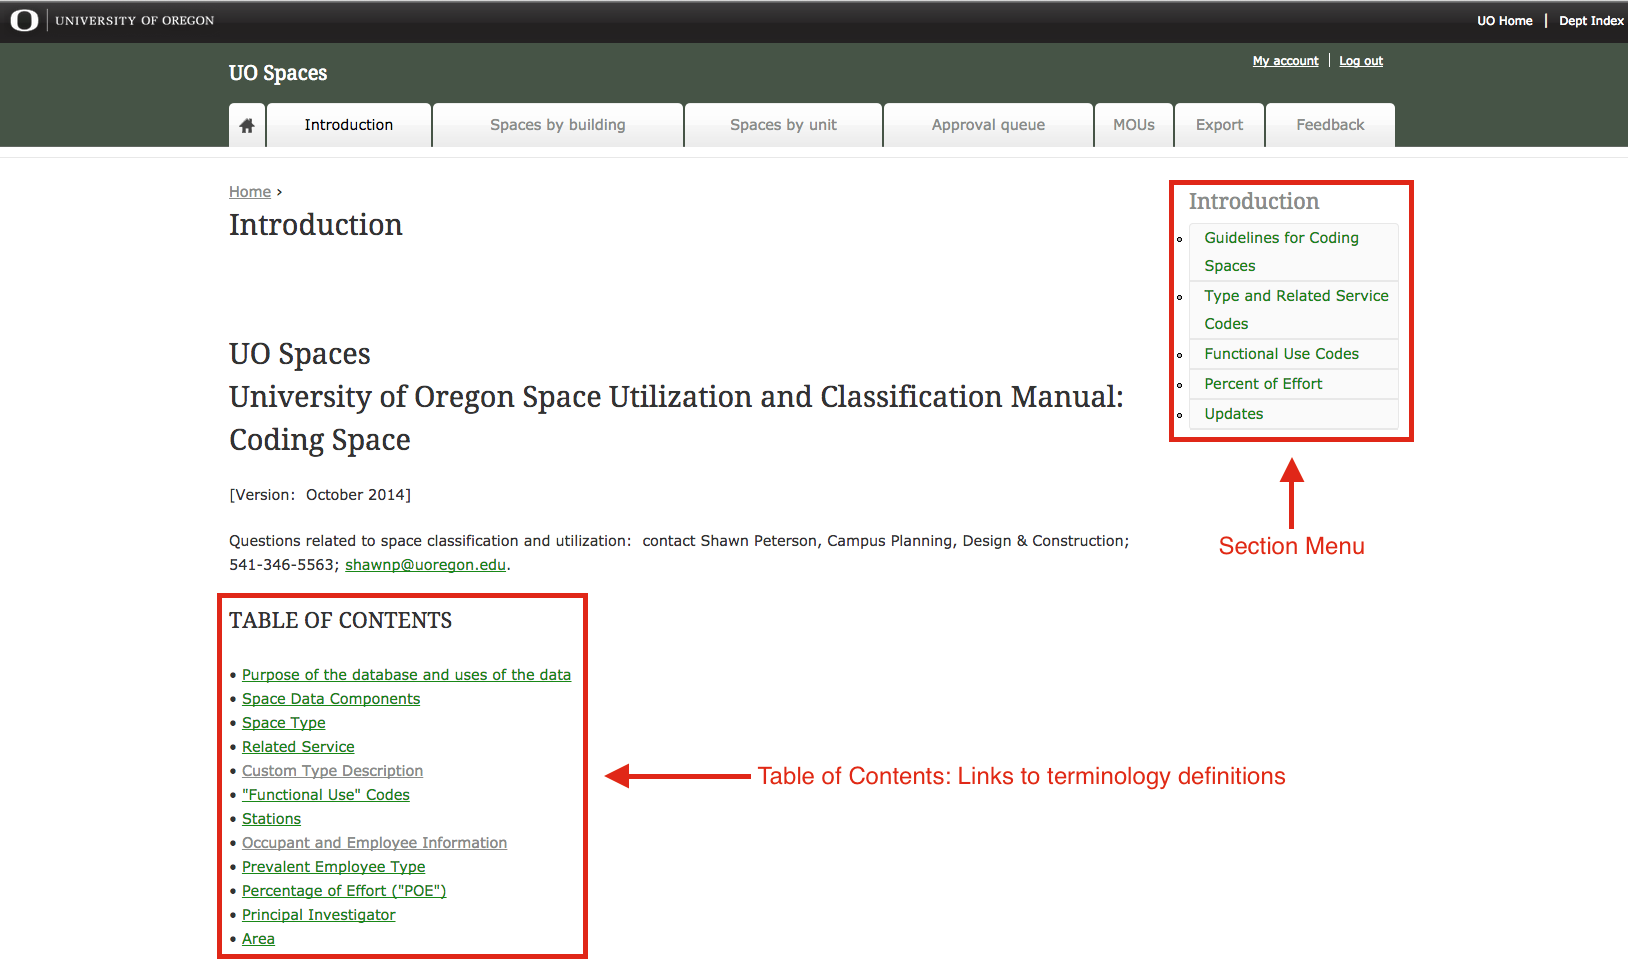
Note: This project is continually being updated based upon the feedback of users and site administrators. Any updates can be found by clicking the Updates link within the Section Menu pictured above. This guide will be updated to reflect those changes and the date of the last update will be noted in the Purpose section of this guide.
Managing Assigned Space
Each department has assigned space that is:
- Primarily managed and used by a unit, or
- Allocated to one unit and loaned to another.
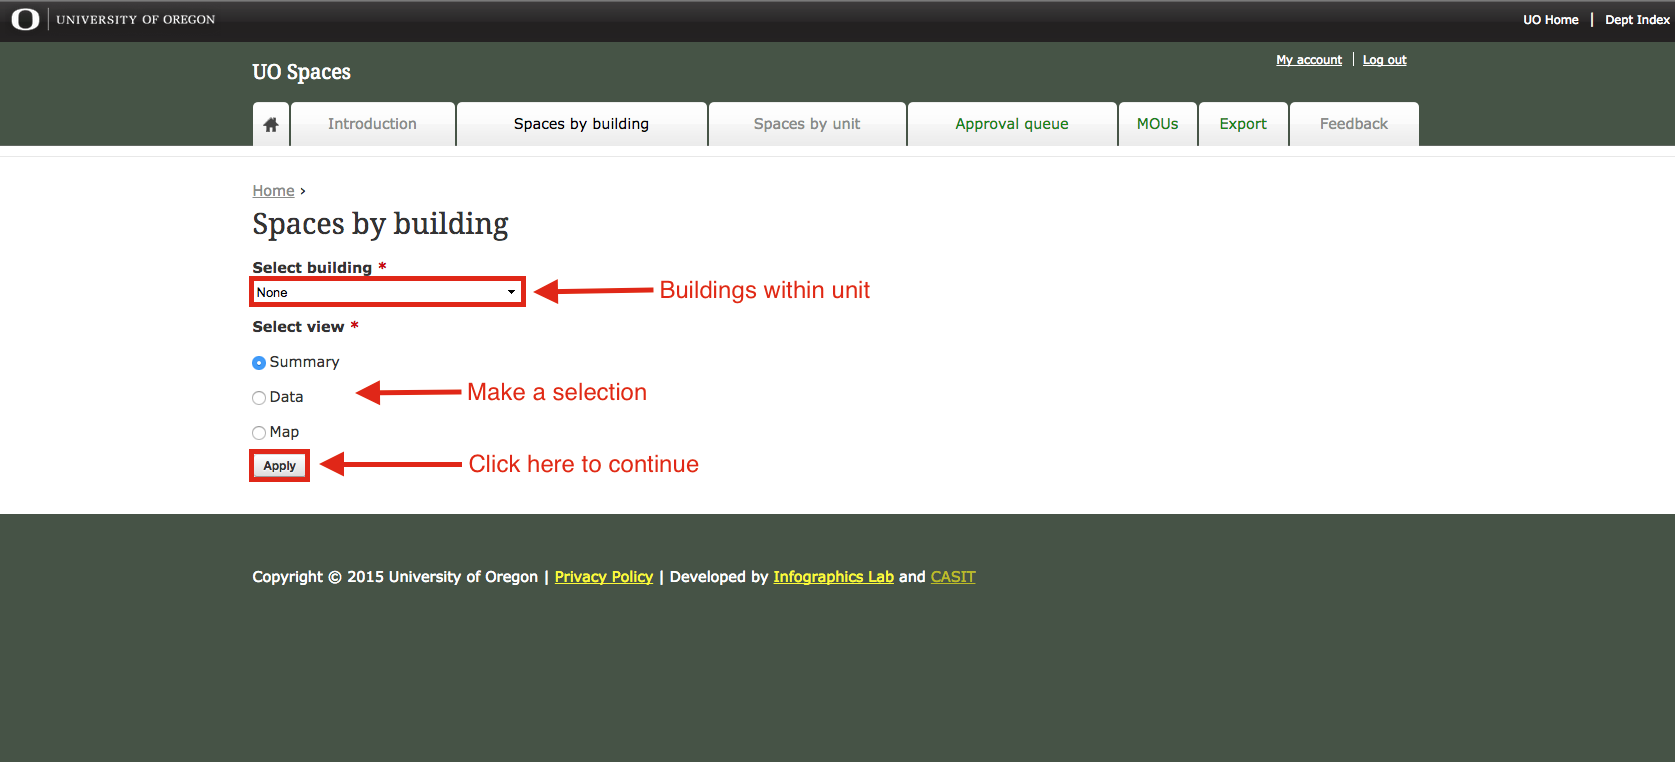
In order to view these spaces, click on the Spaces by building or Spaces by unit tab, select the unit or building to view, then the report type, then click Apply.
Note: Each of the other view types are accessible from each of the other types without returning to this screen.
Below is the Spaces by building screen...
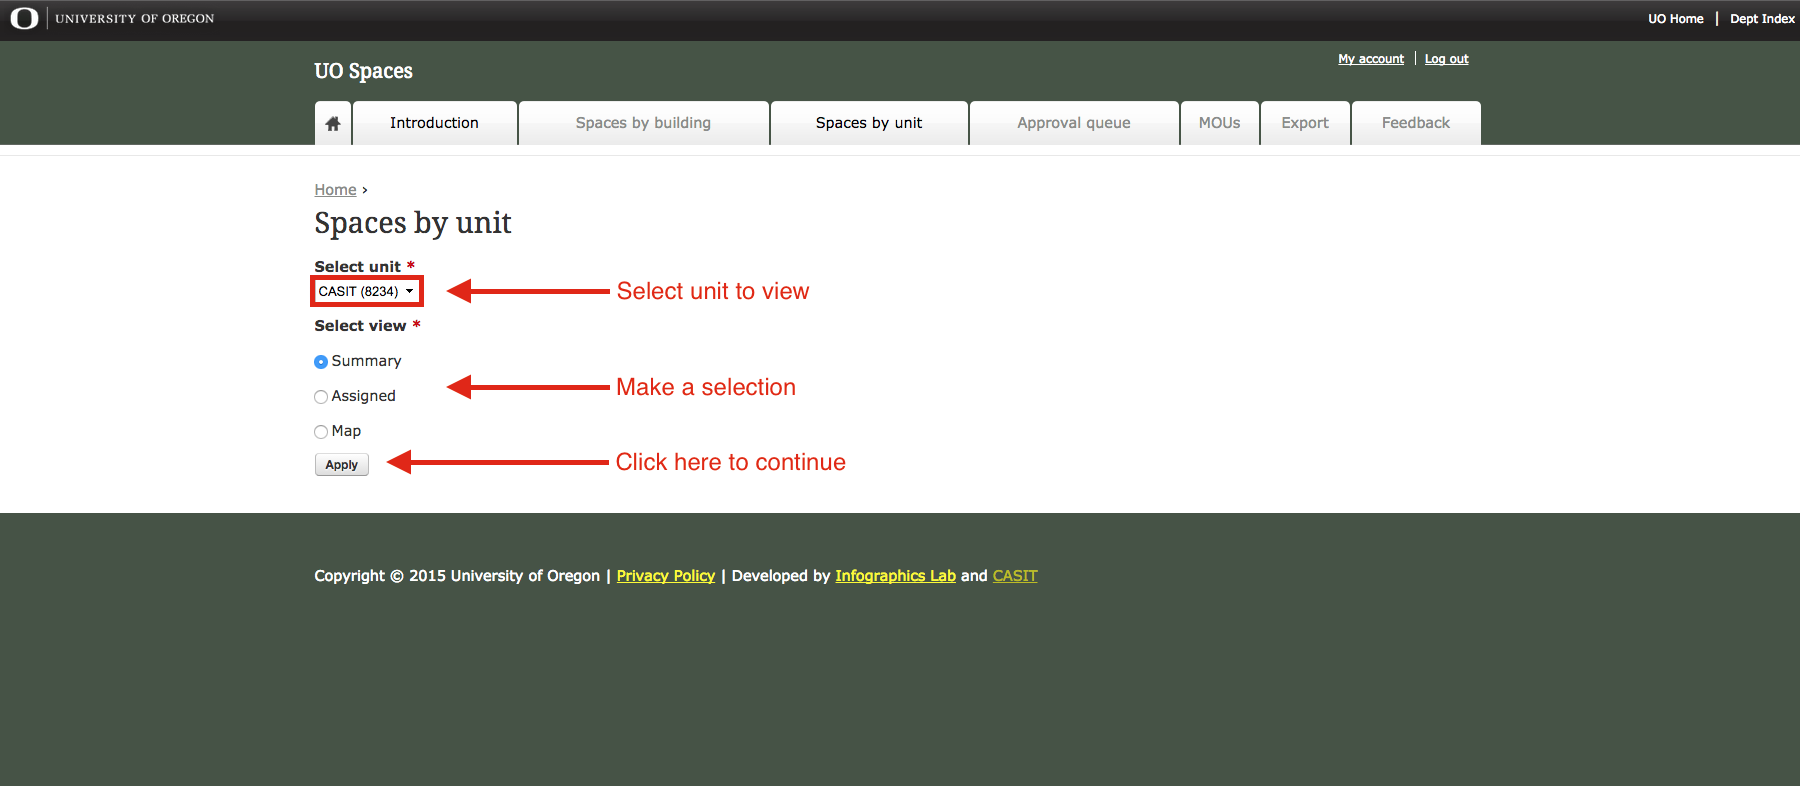
...and the Spaces by unit screen.
View Types
Summary View
The Summary View will give you a condensed report of the amount of assigned and loaned spaces and the square footage of the whole unit.
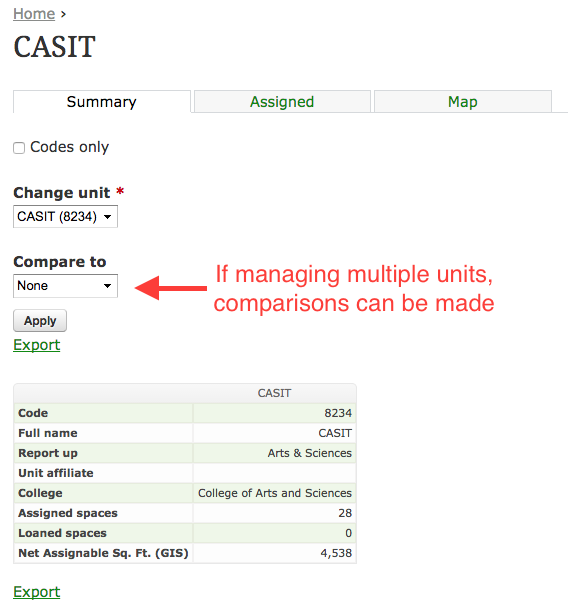
The Summary View within the Unit View will include information on the following:
- Unit Code and Name
- Entity unit reports up to
- Unit affiliation
- College affiliation
- Assigned Spaces (total)
- Loaned Spaces (total)
- Net Assignable Square Footage
- Space count, square footage, support count and square footage for seminar, lab, office, and other spaces.
- Assigned staff types
Note: For the Summary View within the Building View (Spaces by building) will show building specific information and your unit's allocation within that building.
Assigned/Data Views
The Assigned View (or Data View if viewing Spaces by building) will give you a detailed list of all assigned spaces, classification codes, and occupancy.
Note: The unit information can be exported to a CSV file for use in Microsoft Excel or other programs by clicking the Export link at the top or bottom of the table.
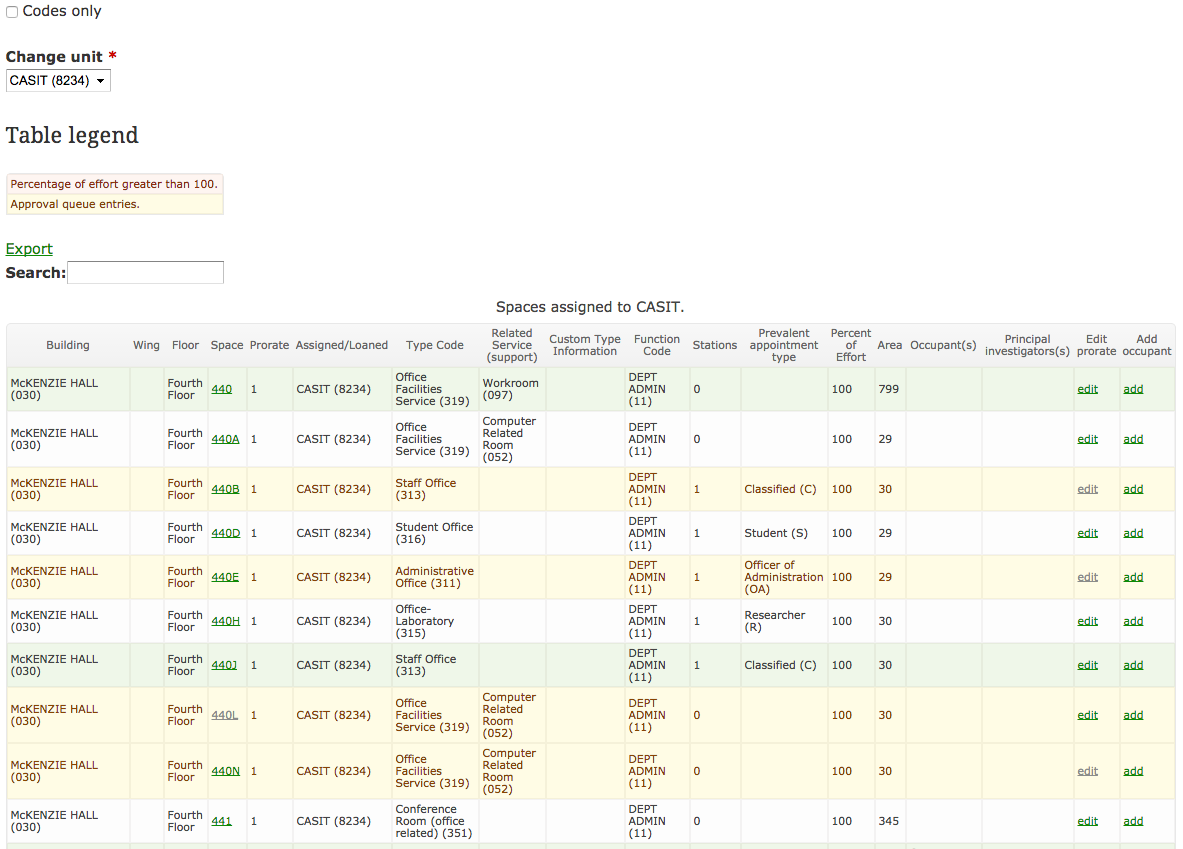
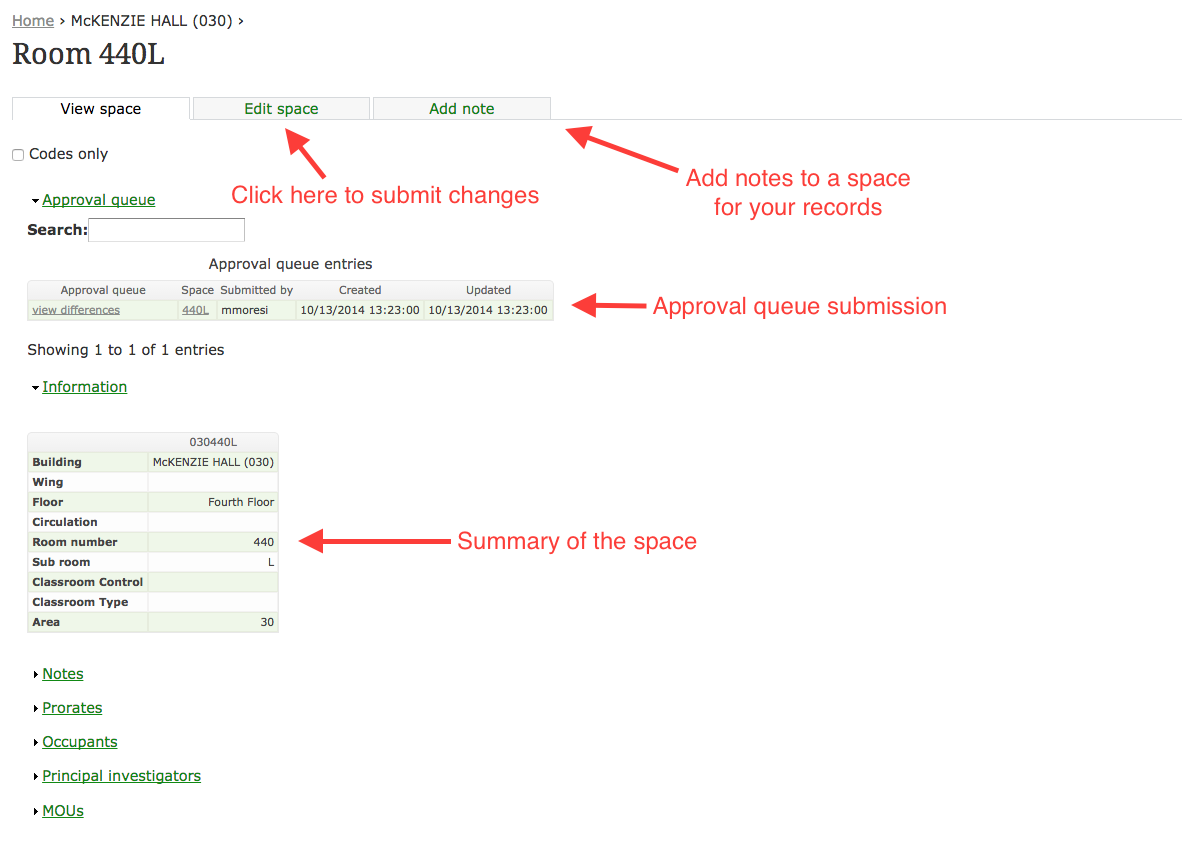
To see the status of any given space, click on the link under the Space column for more information.
The View space tab will show all of the information within the Spaces database. Changes can be made by clicking the Edit space tab.
Note: For adding notes to a space, there are three types that can be added by any user but some have role-based visibility restrictions.
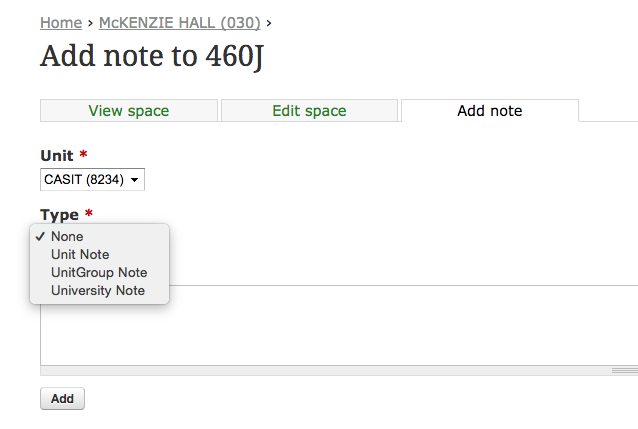
- Level 5 notes (Unit Notes): Can be added and seen by everyone within the unit
- Level 3 notes (UnitGroup Notes): Can be added by everyone but seen by those with Level 3 and 1 roles
- Level 1 notes (University Notes): Can be added by everyone but seen by those with Level 1 role
Type in the note, then click Add to save.
Additional notes, the existing prorates, occupants, principal investigators, and MOUs will be under each heading.
Map View
The Map View will give you a layout of where assigned and loaned spaces are located throughout campus.
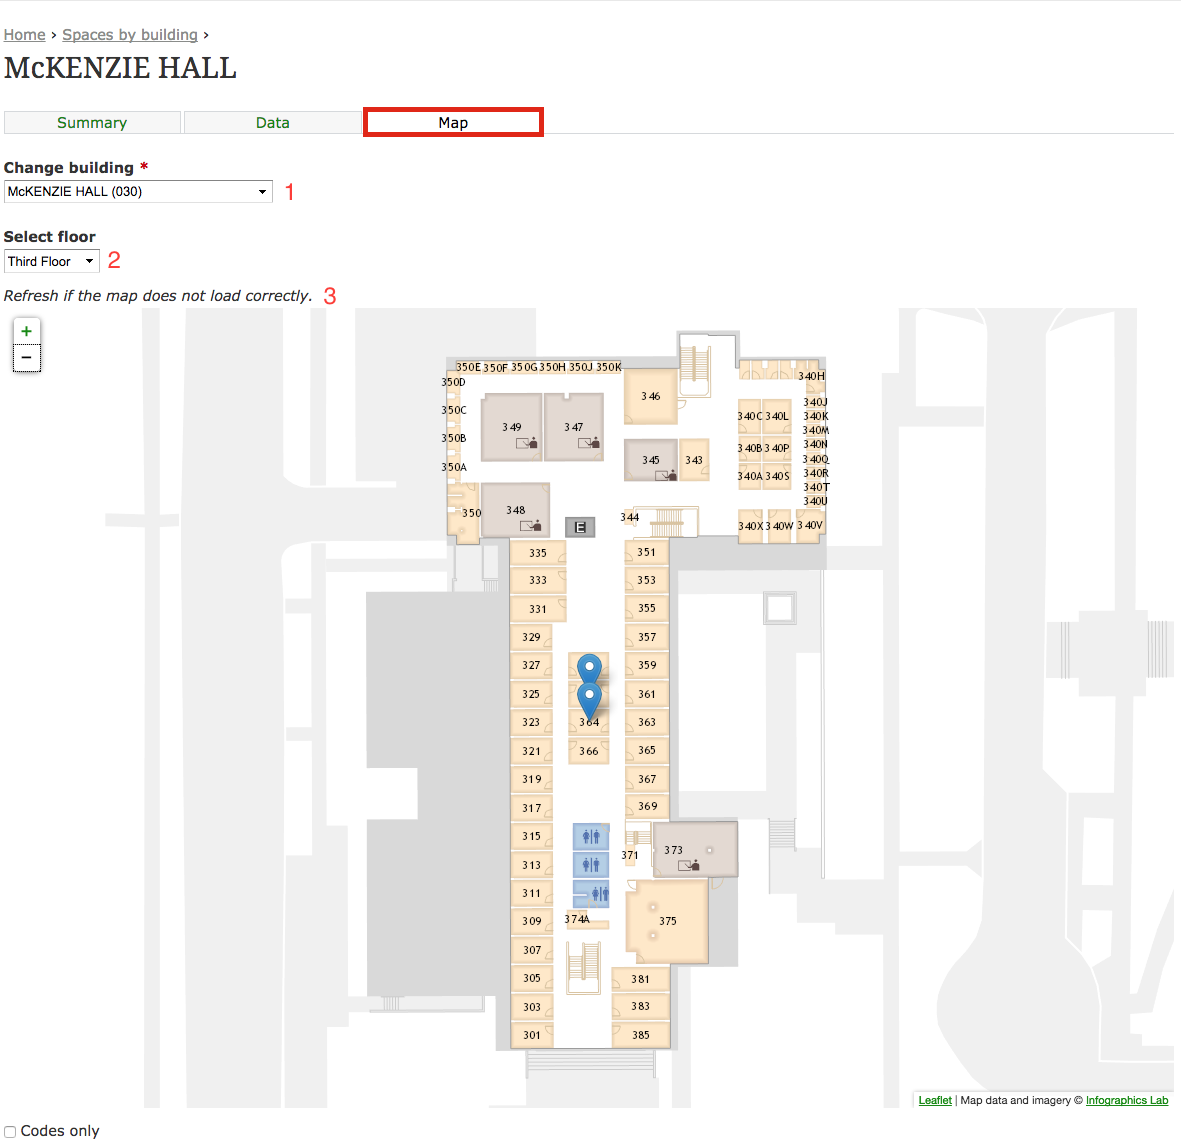
Blue room markers will indicate the spaces supervised by your unit(s). Click on the marker, then select the space number link to view the space properties.
- The visible buildings are restricted to those within your supervised unit(s)...
- ...and which floors those spaces are located
- Be sure to refresh if the map does not load correctly – two to three times if necessary.
Editing Prorates
As seen in the Assigned View, each space that is assigned may be edited to reflect its current use. In order to make the edits, click the edit link in the Edit prorate column.
Note: Editing of a space also may be done by clicking on the space number, then selecting the Edit Space tab on the subsequent page.
Adding and Assigning Occupants to Spaces
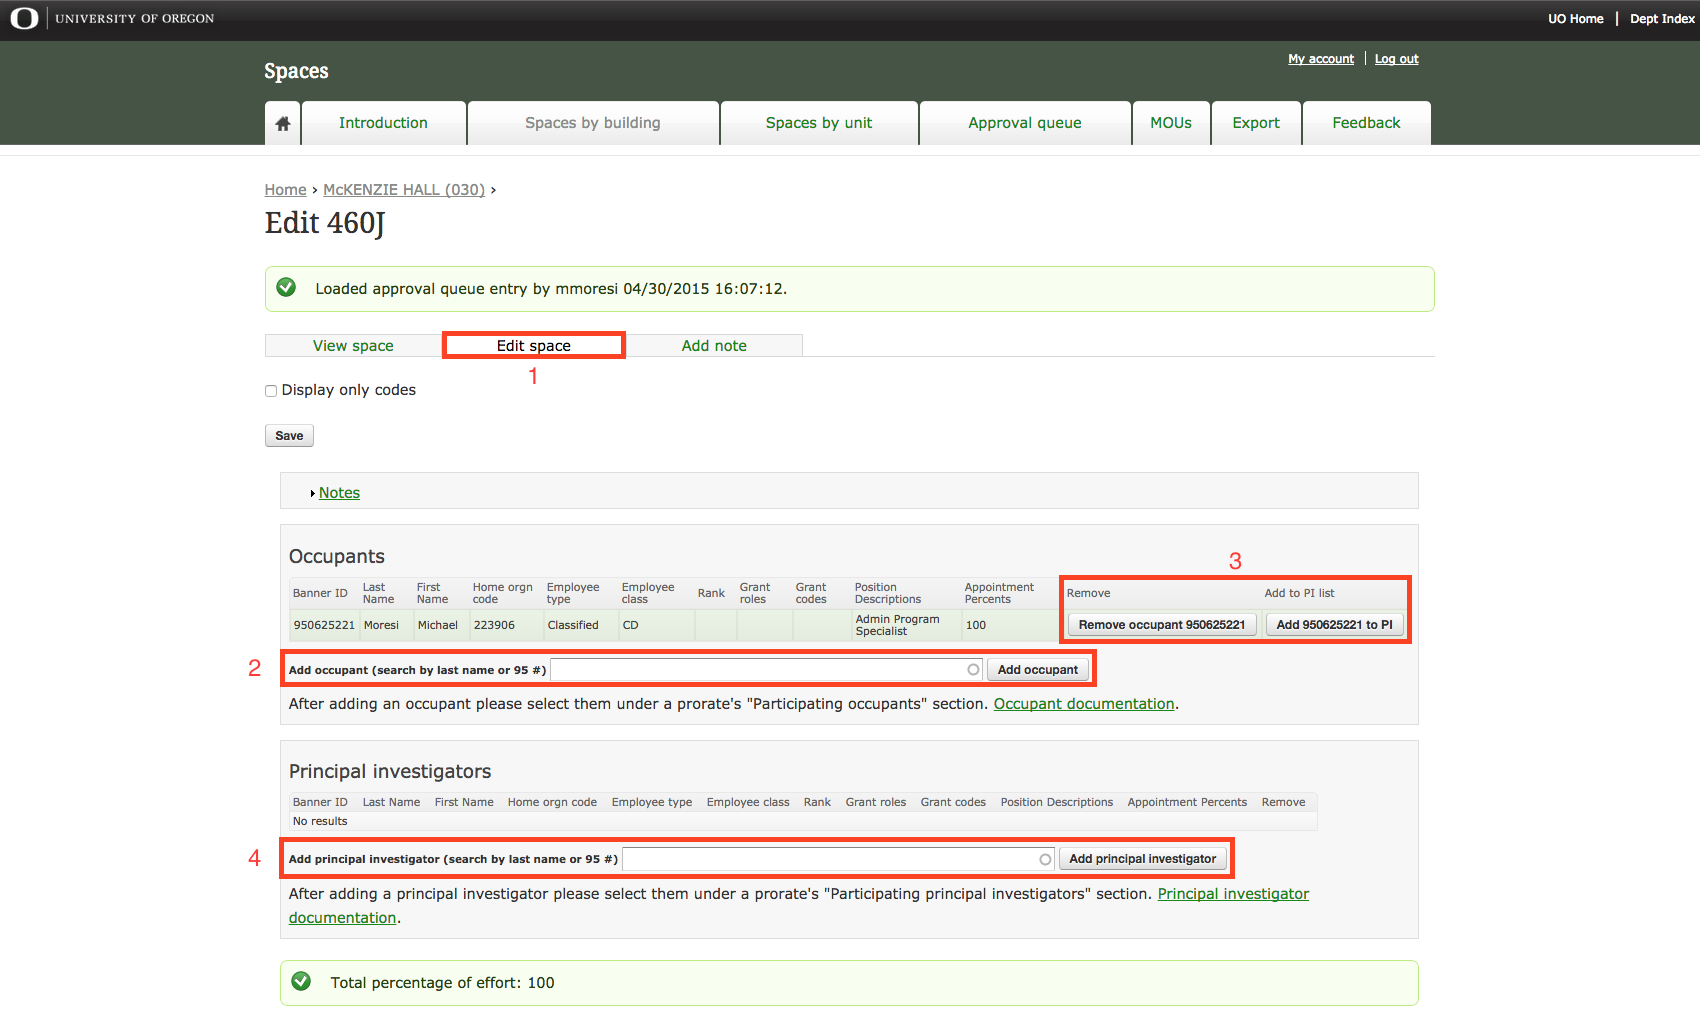
- Click on the Edit space tab in the desired space
- Type in the last name or DuckID or 95 number of the occupant you wish to add, then click Add occupant
- For principal investigators, use the Add principal investigator field in like fashion
- Occupants who are added (or assigned) can be removed or can be added as a principal investigator (PI)
- Click on Prorate 1 to assign the occupant to the space
- Some spaces may have multiple prorates, click on the desired prorate to proceed.
The Participating occupants (and Participating principal investigators; both pictured above) area of a prorate will automatically allow you to assign the occupant or PI to the space.
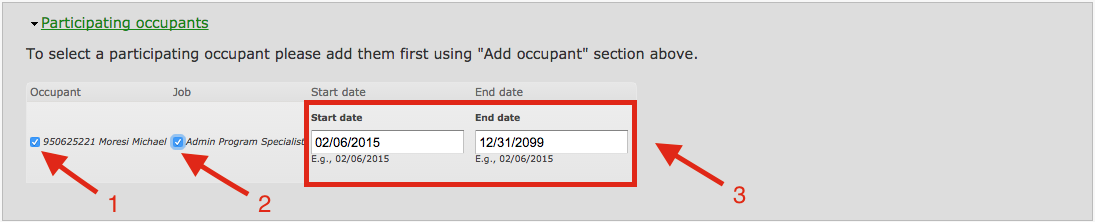
- Check the box for the Occupant
- Check the box for the Job.
- Adding the start and end dates are optional.
To remove an occupant from a space, click the Remove occupant button adjacent to the occupant in the Occupants section (above the prorate section)
Once all edits for the occupant(s) is complete, scroll down to the bottom of the screen and click Save to proceed.
Note: Making changes here will not make changes within the UO Directory. Users must still submit changes to Network and Telecom Services. Additionally, if there are other changes regarding job titles, preferred names, and changes or typographical errors regarding your position title, click this link for the appropriate process.
Note 2: Prorates may be removed by clicking the Remove Prorate button within the Prorate screen. This is useful when there are new purposes for the space or if a prorate was erroneously added.
Note 3: When adding or editing an occupant/principal investigator without saving, be sure to add them to a prorate or the following message will appear (pictured below).

Switching occupants from one space to another
The process is based on the above process but here is a succinct summary:
- Under Room A:
- Click on Add under the Assigned screen where you see all the spaces
- At the top of that section, you will see the existing occupants assigned to that space. In the Add Occupant field, type in Occupant 1's last name or UO ID (95# number), find and select Occupant 1, then click Add Occupant. They should now be applied to the roster of occupants above.
- Next, scroll below until you find Prorate 1, then click on Prorate 1 (or whichever prorate you are changing)
- You should see Occupant 1's name and position there, click on the checkboxes adjacent to their name and position and uncheck the boxes next to Occupant 2's name and title.
- Scroll down and click Save.
- Under Room B:
- Repeat all of the above steps but swap Occupant 2 for Occupant 1 in all above steps.
Once changes have been saved for approval, a note will be seen at the top of the View Space section for the edited space indicating changes have been loaded into the approval queue. Spaces or sections within a spaces that have approval queue entries will appear in yellow. See Approval Queue Process for more information.

Editing Space Codes and Types
Within the Assigned View table for your building or unit, each space is given type and function codes based on the usual work done within (this includes prevalent appointment types, percent of effort, and occupancy). If a space is newly assigned or loaned to your unit or if there is a room is repurposed for different purpose, the space codes are required to reflect those changes.
When changing type and code information for a space, it is done on a per space or per prorate basis depending on the nature of the changes being made.
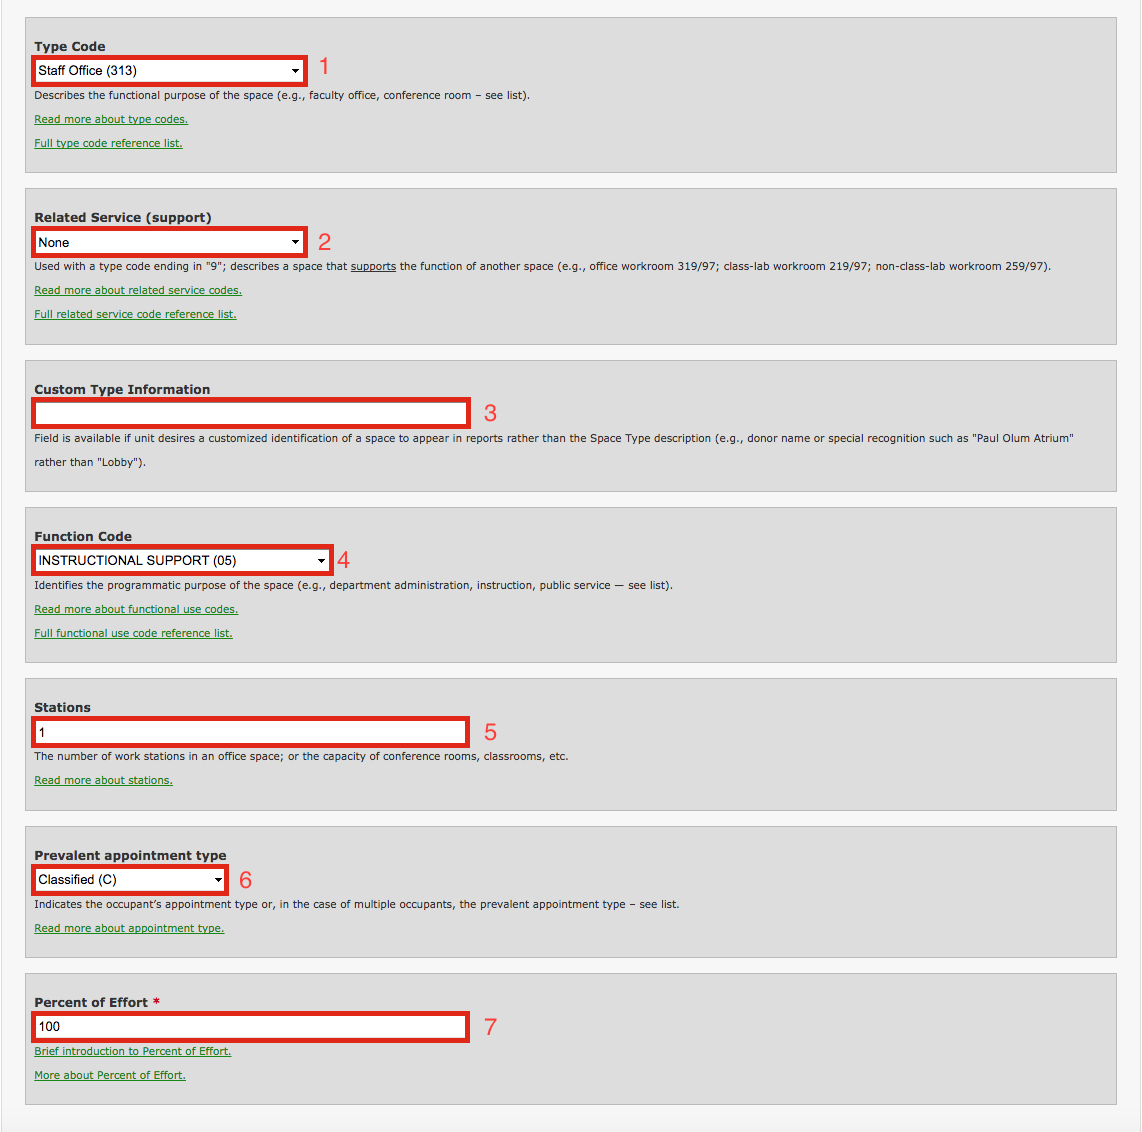
- Select the type code appropriate for the work done in the space
- Select the related service (support code) if necessary
- Enter any custom type information for the space (e.g., donor name or special recognition)
- Select the appropriate function code for the space
- Enter the number of work stations or capacity (for conference rooms and classrooms) of the space.
- Select the occupant's appointment type or the prevalent type (if there are multiple occupants)
- Enter the percent of effort for the prorate.
- All spaces with one prorate will have 100 percent of effort
- In the case of multiple prorates, click here for more information.
Once all changes have been made, scroll to the bottom of the page and click Save to proceed. All changes made will be sent to the approval queue and the space will be noted as described above.
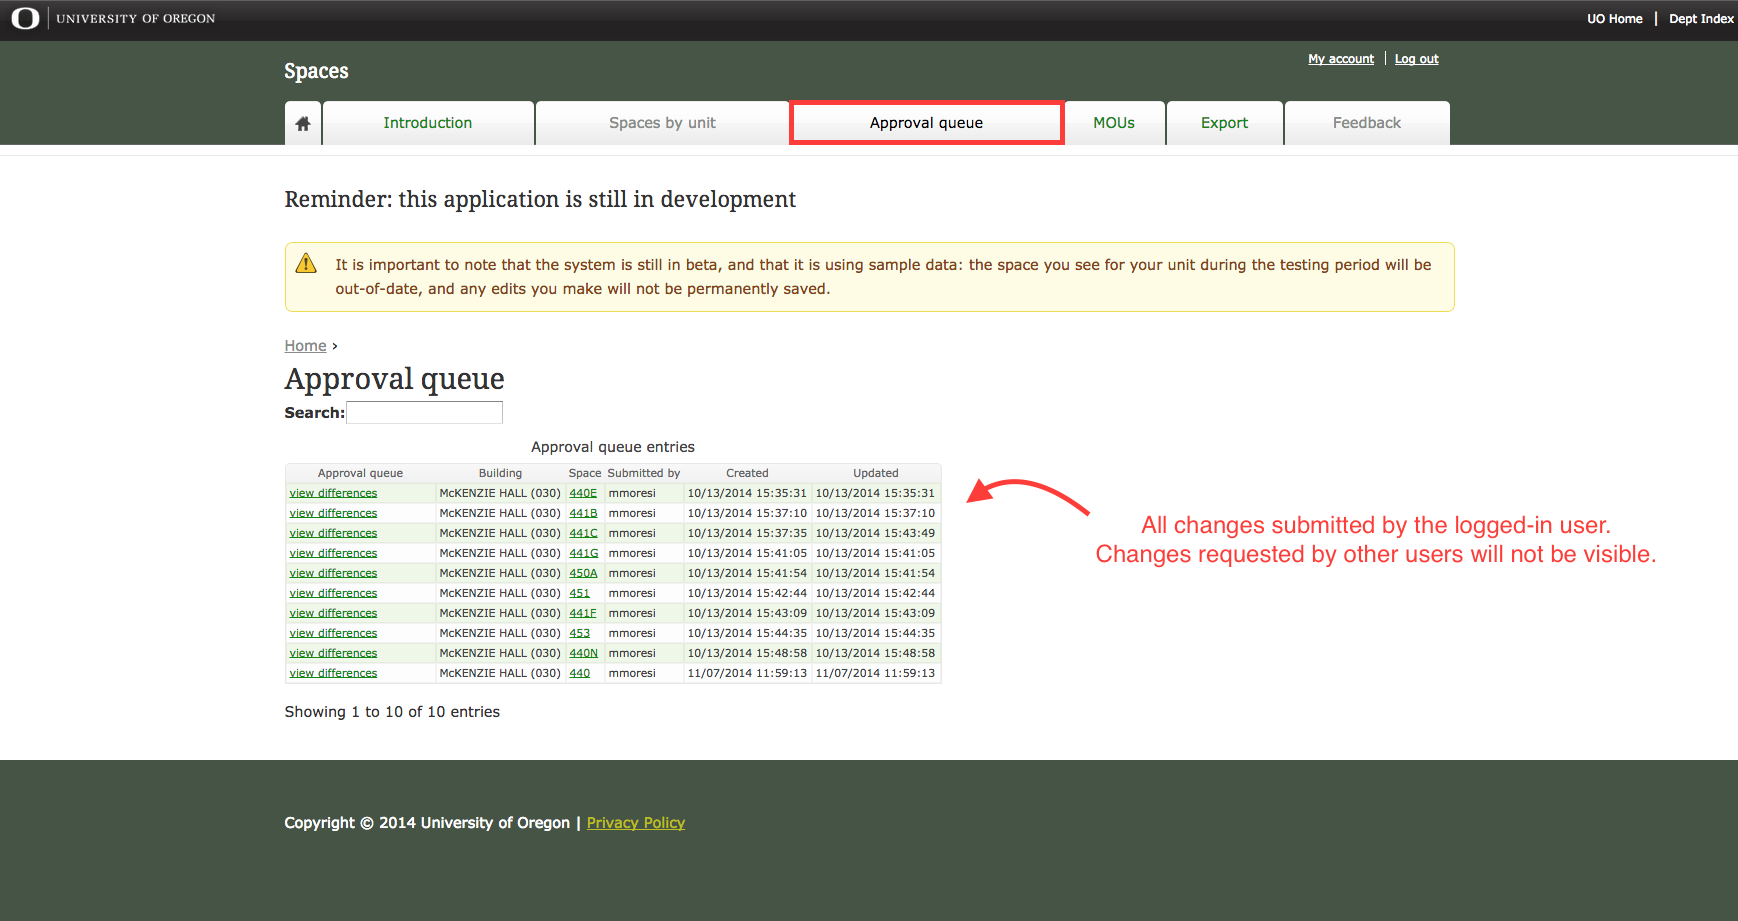
Approval Queue Process
When new occupants and principal investigators are added to existing prorates or when new prorates are created, all changes are submitted to an approval queue and seen as change requests to be approved by Campus Planning, Design, and Construction (CPDC). Authorized users can see the requests that they have submitted by clicking on the Approval Queue tab. The user may see their change requests but cannot see all change requests from other users. Conversely, CPDC can see all change requests from all users.
Once the change request has been approved by the CPDC, the approved request will be removed from the queue.
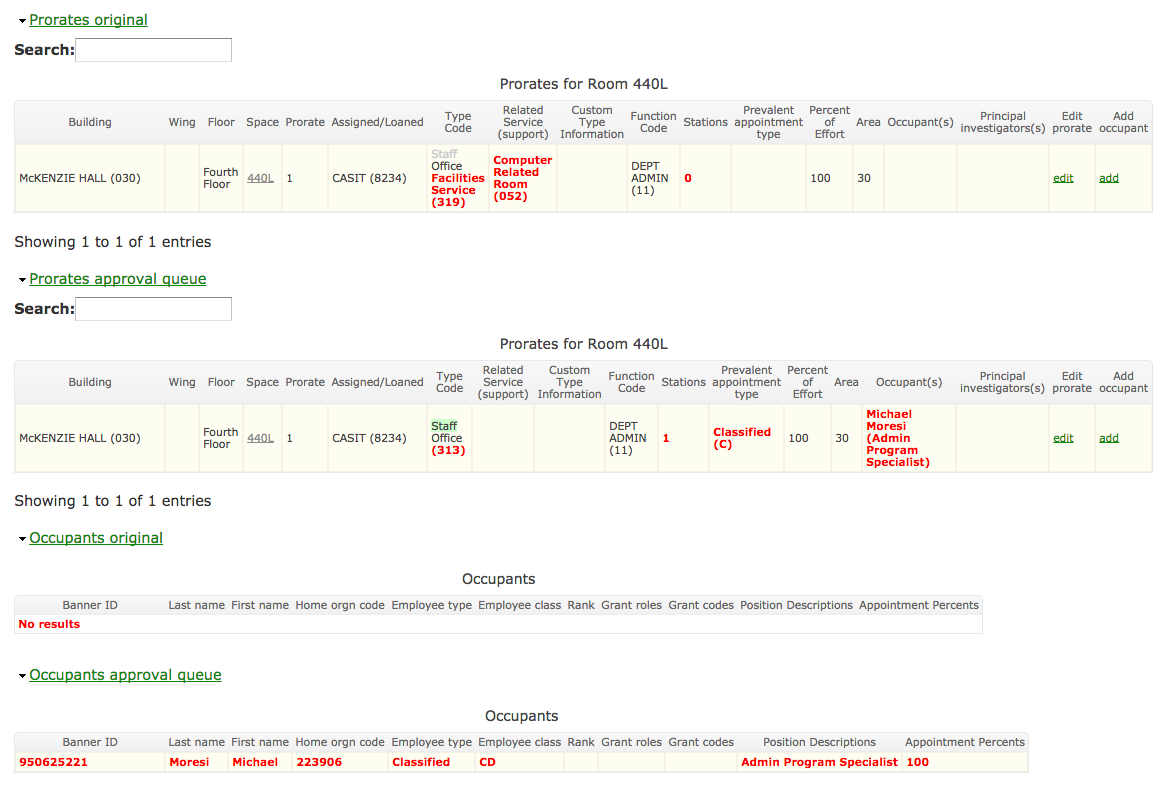
Additionally, each change request will appear under its respective space when looking at the unit's assigned spaces list (marked in yellow)...

...and while viewing or editing the specific space.
The user may view differences between the record and the change request. Text in red indicates what has changed between records.
Note: Gray and green also show changes but only for partial changes in a particular field.
Exporting Unit Data
Data from your unit(s) can be exported to CSV file for use in external software.
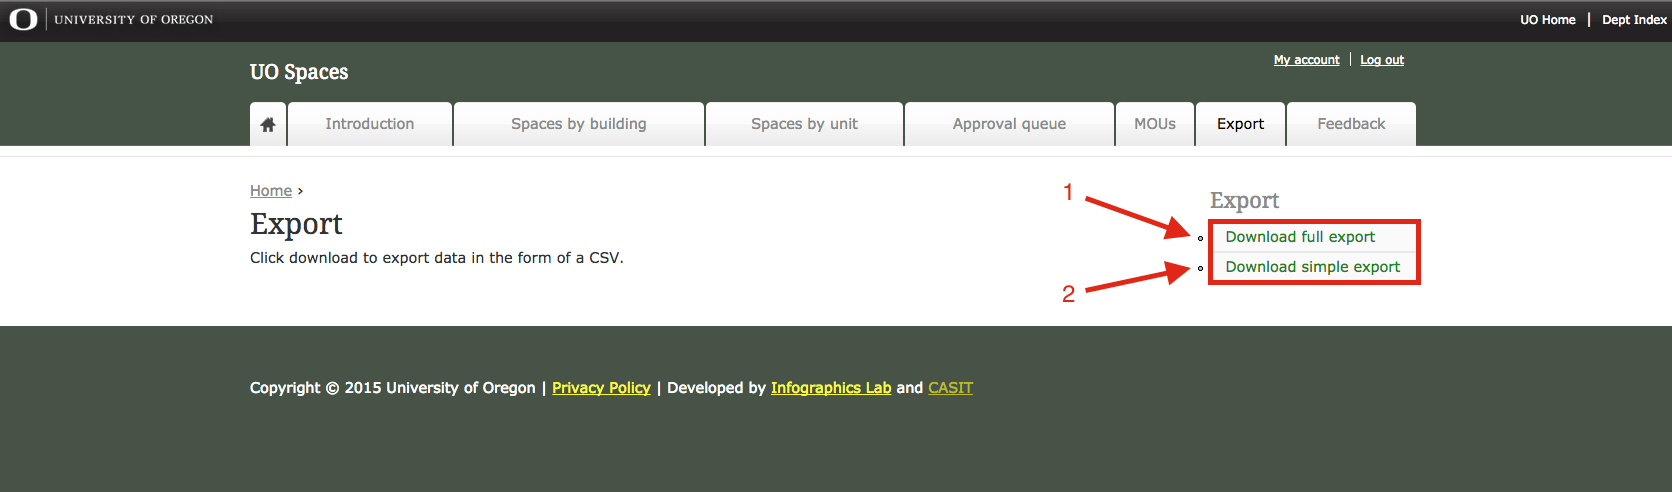
Click the Export tab:
- Click on the Download full export if you would like a CSV file based on the Summary and Assigned Views listed above
- Click on the Download simple export if you would like a CSV file based on the Summary View listed above
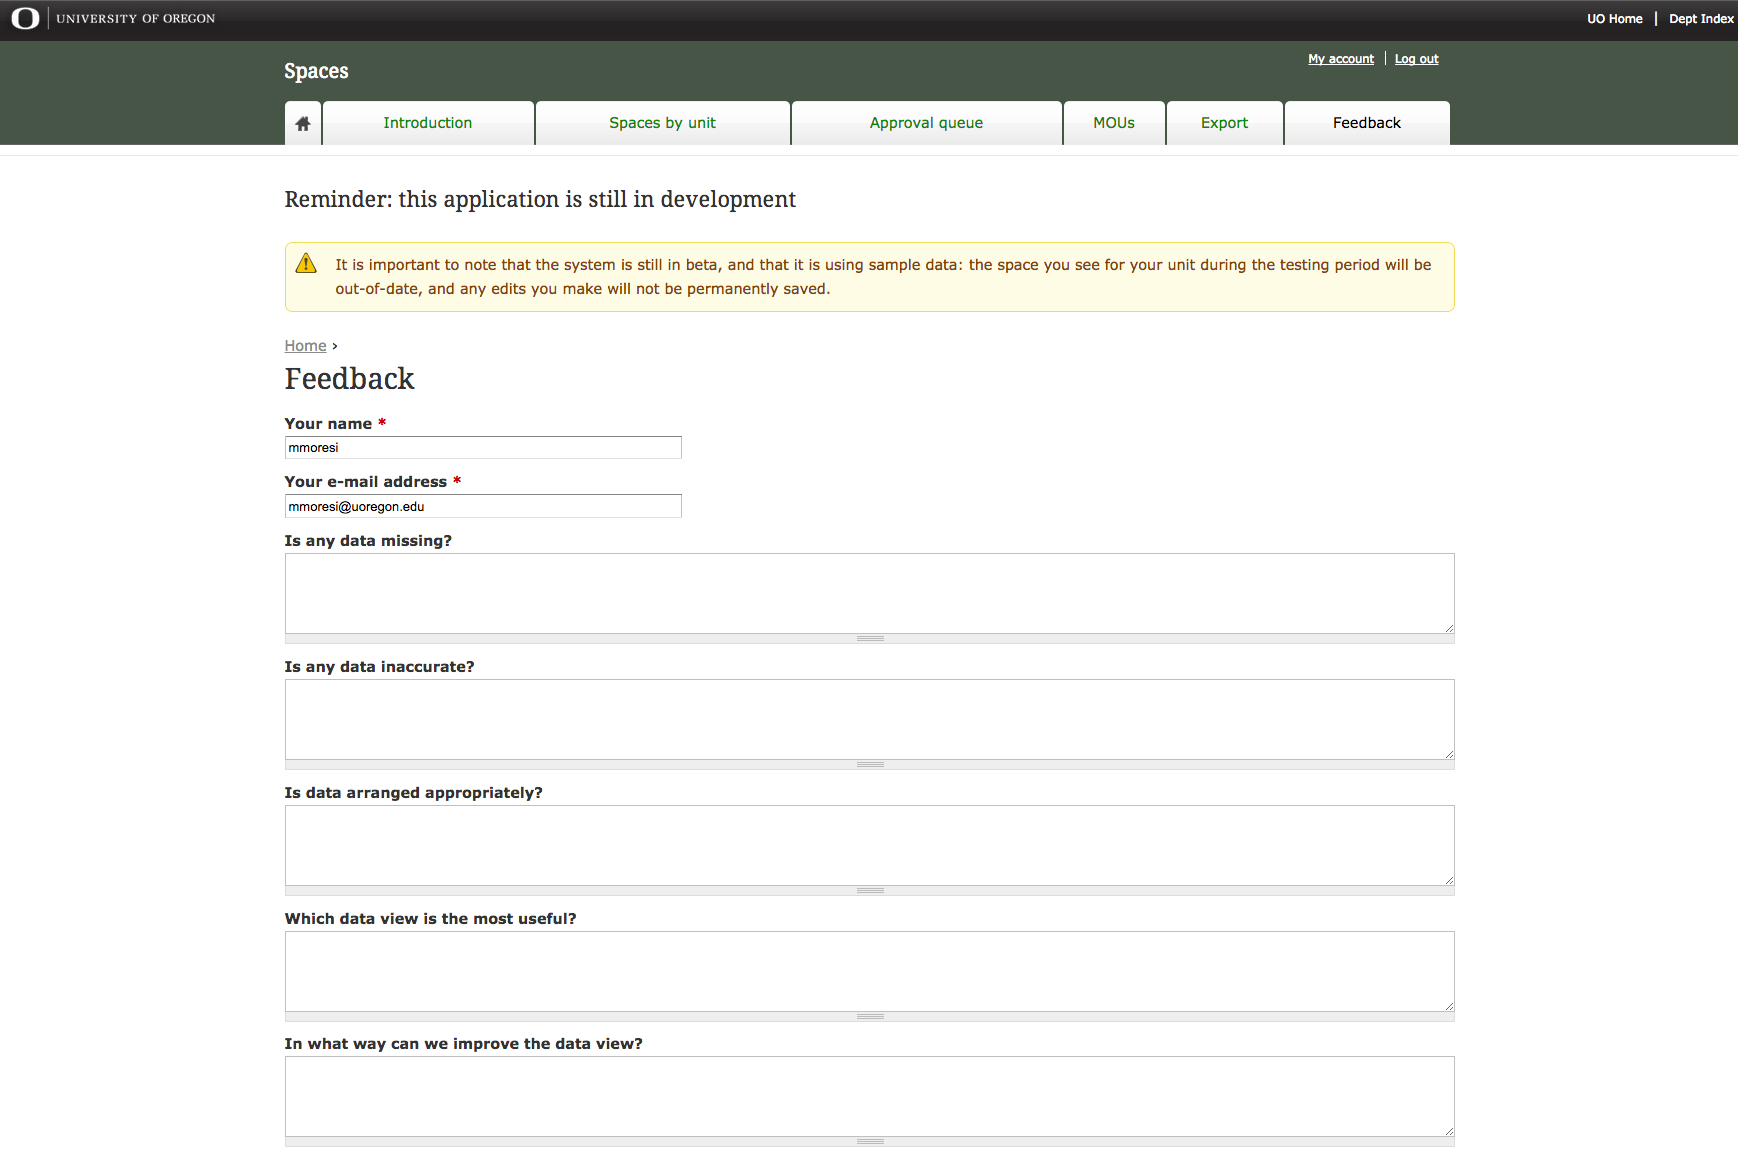
Submitting Feedback
Questions, comments, or suggestions can be submitted to the UO Spaces webpage administrators by clicking the Feedback tab, filling in the appropriate field, then clicking Submit at the bottom of the page.
Links to Additional Content
For requesting access to the UO Spaces Project, click here for the form.
For more information about the UO Spaces Project, click here to see the introductory documentation.